Heavy rain can quickly expose weak points around a window frame. Water stains, peeling paint, damp patches and mould growth are more than cosmetic problems. If the source of the leak is not addressed promptly, moisture may continue to penetrate the surrounding wall and cause further damage to the interior finish.
The correct repair sequence is simple:
Work from the outside in. Stop the water ingress first, then restore the interior wall.
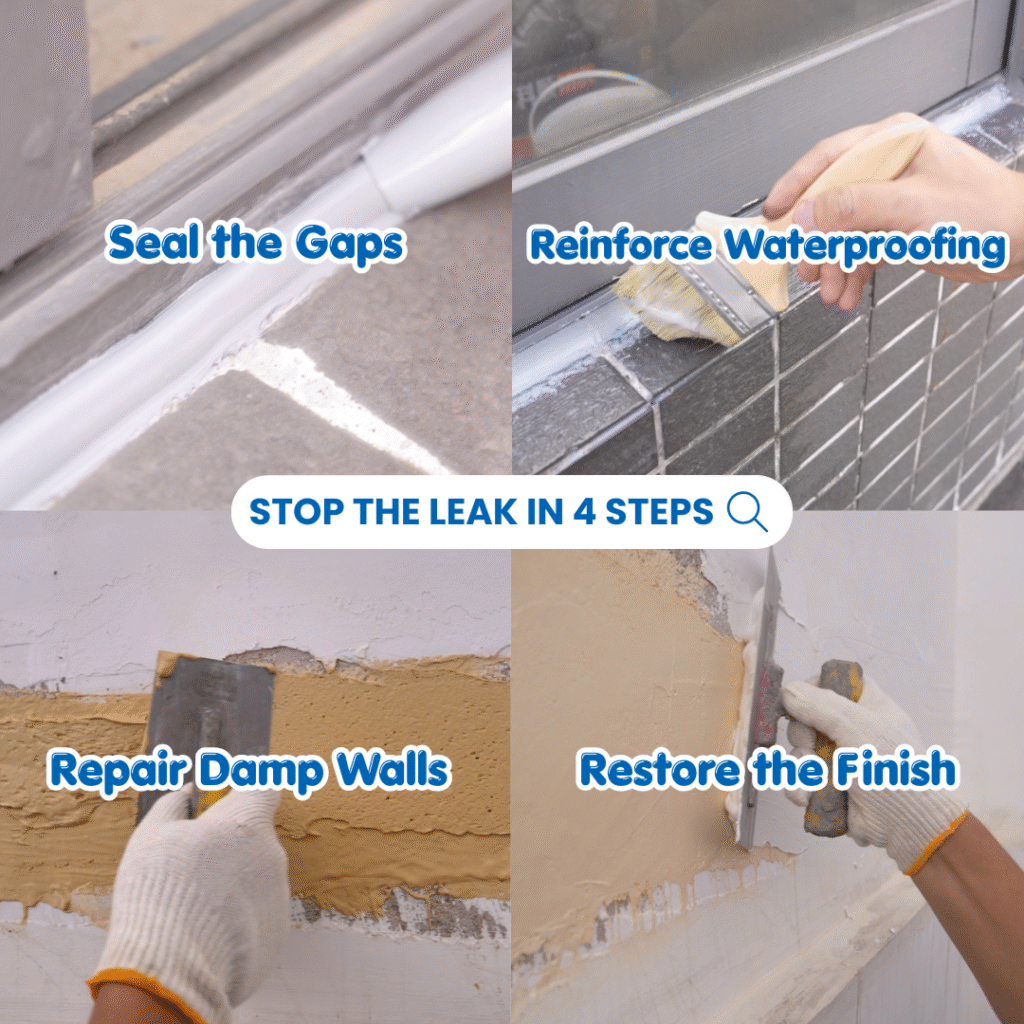
For localised leakage around the window-frame-to-wall junction, this four-step waterproofing repair system helps control the problem before the damage spreads.
Quick Answer: To repair a leaking window after heavy rain, first remove the deteriorated sealant around the exterior window frame and reseal the perimeter joints. Reinforce the surrounding external wall with a transparent waterproof coating. Once the water ingress has been controlled, remove damaged interior finishes, strengthen the substrate and restore the wall surface.
Materials Required for Window Leak Repair
Prepare the following five materials before starting the repair:
Step 1: Remove the Old Sealant and Reseal the Window Frame
Start from the exterior side of the window.
Carefully remove the aged, cracked or detached sealant around the window-frame perimeter. Residual sealant, dust, loose particles and surface contaminants should be removed to create a clean and sound substrate.
Apply XS-C001 Weather-Resistant Silicone Sealant along the window-frame-to-wall joints to restore a continuous weather seal.
Good substrate preparation is essential. A clean, stable and properly sealed joint forms the first line of defence against rainwater ingress.
Step 2: Reinforce the Exterior Waterproofing Layer
Allow the silicone sealant to cure in accordance with the product instructions.
Next, apply XS-T316 Transparent Waterproof Coating around the exterior window area. The coating should cover the frame-to-wall junction and the adjacent external wall surface where rainwater may penetrate through fine cracks or weak points.
Apply the coating evenly and inspect the treated area carefully to avoid pinholes, missed sections or discontinuities.
This step creates an additional protective layer while helping to retain the existing appearance of the exterior wall.
Step 3: Repair and Protect the Damp Interior Wall
Once the external source of water ingress has been controlled, move indoors.
Remove loose, damp or deteriorated wall putty, skim coat and peeling paint from the affected area. The exposed substrate should be clean, stable and sufficiently dry before the next treatment is applied.
Apply Latex 001 to strengthen and seal the affected wall surface.
After the base treatment has dried, apply two coats of Aquaflex P500 Anti-Mould & Alkali-Resistant Coating. Allow the first coat to dry properly before applying the second coat.
This interior treatment prepares the wall for surface restoration and helps address common problems associated with prolonged dampness, such as discolouration, mould marks and coating deterioration.
Step 4: Restore the Wall Finish
After the Aquaflex P500 coating has dried completely, apply XS-601 Repair Putty to restore a smooth and even wall surface.
Once the repair putty has dried, sand the area where necessary and repaint the wall with a suitable emulsion paint if required.
The surface should now be ready for final decoration.
Four-Step Window Leak Repair Summary
| Step |
Repair Action |
Recommended Product |
| 1. Seal the gaps |
Remove failed sealant and reseal the exterior window-frame joints |
XS-C001 |
| 2. Reinforce exterior waterproofing |
Apply a transparent waterproof layer around the frame and adjacent external wall |
XS-T316 |
| 3. Repair the damp wall |
Remove damaged finishes, strengthen the substrate and apply two protective coats |
Latex 001 + Aquaflex P500 |
| 4. Restore the finish |
Smooth the repaired surface and repaint where necessary |
XS-601 |
Common Mistakes to Avoid
Repairing Only the Interior Wall
Repainting a damp interior wall without stopping the external source of the leak is only a temporary cosmetic fix. The water ingress may return during the next period of heavy rain.
Applying Sealant Over Loose or Deteriorated Material
New silicone sealant should not be applied directly over failed sealant, dust or loose substrates. Proper removal and cleaning are required to achieve a reliable bond.
Blocking Window Drainage Openings
Do not seal over weep holes or drainage channels. Window systems may require these openings to discharge water safely to the exterior.
Applying New Finishes Before the Wall Is Dry
Trapped moisture may lead to blistering, peeling, staining and recurring mould marks. Allow the substrate and each applied layer to dry properly before proceeding.
Treating Persistent Leakage as a Minor Surface Defect
This repair method is suitable for localised leakage around the window-frame-to-wall interface. If water continues to enter after the repair, the problem may involve damaged flashing, cracks in the facade, defective joints or concealed water paths. A professional inspection is recommended.
Frequently Asked Questions
Can I repair a leaking window from the inside only?
Interior repairs alone are usually insufficient if rainwater is still entering from the exterior. The outside source of water ingress should be controlled before the internal wall finish is restored.
Can I apply new silicone sealant directly over the old sealant?
It is best to remove deteriorated sealant first. A clean and stable substrate helps the new sealant form a more reliable perimeter joint.
Is XS-T316 a replacement for silicone sealant?
No. The two products serve complementary functions. XS-C001 is used to reseal the window-frame joints, while XS-T316 reinforces the waterproofing protection around the surrounding exterior area.
Why does mould return after repainting?
Mould may return if the moisture source has not been eliminated or if the affected wall has not dried sufficiently before repainting. Waterproofing repair and substrate treatment should be completed before the final decorative finish is applied.
When should I call a professional contractor?
Arrange a professional inspection if the leakage is severe, affects multiple rooms, continues after repair, appears around large facade cracks or occurs at difficult-to-access locations such as high-rise external walls.